
Everything You Need to Know Before Installing a New Shower
Installing a new shower is one of the best ways to improve your bathroom’s comfort, functionality, and value. Whether you’re replacing an old shower, upgrading to a modern walk-in design, or adding a shower to a newly remodeled bathroom, proper installation is essential for long-lasting performance.
Many homeowners wonder whether shower installation is a DIY-friendly project or if professional help is required. The answer depends on your experience, the type of shower you’re installing, and whether plumbing or electrical modifications are involved. While some installations are straightforward, others require careful planning to prevent leaks, drainage issues, and costly repairs.
This step-by-step guide explains how to install a shower at home, the tools you’ll need, common mistakes to avoid, and when it’s best to call a professional. By following the right process, you can create a durable, efficient, and attractive shower that serves your home for years.
Can You Install a Shower Yourself?
Yes, many homeowners can install a standard shower themselves if they have basic DIY experience and the existing plumbing is already in place. Replacing a shower enclosure or shower base is often manageable with the right tools and preparation.
However, projects involving new plumbing lines, drain relocation, waterproofing systems, electrical work, or structural changes usually require professional experience. Improper installation can lead to water leaks, mold growth, damaged flooring, and expensive repairs.
Before starting, honestly assess your skills and determine whether professional assistance would save time and prevent future problems.
Tools and Materials You’ll Need
Having everything ready before you begin helps make the installation process smoother.
Common Tools
- Tape measure
- Level
- Power drill
- Screwdrivers
- Adjustable wrench
- Utility knife
- Caulking gun
- Rubber mallet
- Bucket and sponge
Common Materials
- Shower base or shower tray
- Shower wall panels or tile
- Shower valve and showerhead
- Drain assembly
- PVC pipes and fittings (if needed)
- Waterproof silicone sealant
- Plumber’s tape
- Mounting screws and anchors
Choose quality materials designed for bathrooms to improve durability and reduce future maintenance.
Choose the Right Shower for Your Bathroom
Selecting the right shower before installation is one of the most important decisions.
Walk-In Shower
Walk-in showers provide a modern appearance, easy accessibility, and spacious design. They work well in larger bathrooms and require proper waterproofing and drainage.
Corner Shower
Corner showers maximize space and are ideal for smaller bathrooms. They are popular in guest bathrooms and compact homes.
Alcove Shower
Installed between three walls, alcove showers are among the most common residential shower styles. They are practical, affordable, and relatively simple to install.
Shower and Tub Combination
A shower-tub combination is an excellent choice for families who want the flexibility of both bathing and showering while saving space.
Choose a shower style that fits your bathroom layout, budget, and daily needs rather than focusing only on appearance.
Step 1: Prepare the Bathroom
Preparation is the foundation of a successful installation.
Start by turning off the main water supply before removing any existing fixtures. Carefully disconnect the old shower, shower doors, and plumbing components if you’re replacing an existing unit.
Inspect the floor, walls, plumbing lines, and subfloor for signs of water damage, mold, rot, or structural issues. Repair any problems before installing the new shower to avoid future complications.
Clean the entire work area thoroughly so the new materials can be installed on a stable, level surface.
Step 2: Install the Shower Base
The shower base (or shower tray) provides the foundation for the entire shower system.
Before securing it permanently, check that the floor is level. An uneven base can prevent proper drainage and allow water to collect in unwanted areas.
Position the shower base according to the manufacturer’s instructions and verify that the drain opening aligns correctly with the existing plumbing. Once everything fits properly, secure the base and apply waterproof sealant around all recommended edges.
Allow the base to set completely before continuing with the installation.
Step 3: Install or Connect the Drain
Proper drainage is essential for preventing water damage.
Attach the drain assembly securely to the shower base and connect it to the home’s drainpipe. Tighten all fittings carefully and use plumber’s tape where recommended to create watertight connections.
Before covering the plumbing, pour water into the drain to verify that it flows properly and check every connection for leaks.
A few minutes spent testing now can prevent expensive repairs later.
Step 4: Install the Shower Wall Panels
Once the shower base is securely in place, it’s time to install the shower walls. Depending on your design, you may use prefabricated wall panels, acrylic surrounds, fiberglass panels, or ceramic tiles.
Before attaching the panels, make sure the walls are clean, dry, and structurally sound. If you’re installing tile, apply a waterproof backer board first to protect the wall from moisture.
Carefully position each panel according to the manufacturer’s instructions and check that every piece is level before securing it. Leave the recommended expansion gaps where required, then seal all joints with a high-quality waterproof silicone sealant to help prevent future leaks.
Properly installed wall panels not only improve the appearance of your bathroom but also create an effective moisture barrier.
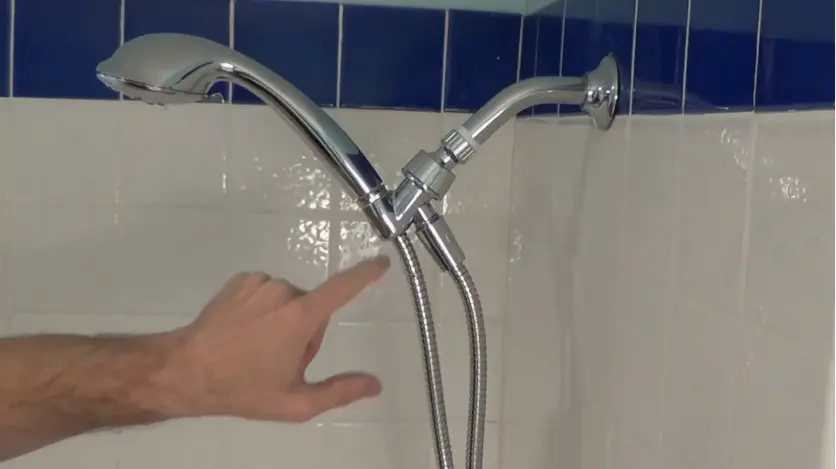
Step 5: Install the Shower Valve and Showerhead
The next step is installing the shower valve, faucet trim, and showerhead.
If you’re replacing existing fixtures without moving plumbing lines, this part is usually straightforward. However, if new water supply lines or valve locations are required, additional plumbing work may be necessary.
Attach the hot and cold water connections carefully and tighten every fitting securely. Wrap threaded connections with plumber’s tape where recommended to create leak-resistant seals.
Once the valve is installed, mount the shower arm and attach the showerhead. Follow the manufacturer’s installation instructions to avoid over-tightening or damaging the fixtures.
Choosing water-efficient fixtures can help reduce water usage while maintaining strong shower performance.
Step 6: Install the Shower Door or Enclosure
If your shower includes a glass enclosure or shower door, install it only after the walls and base have been completed.
Carefully measure the opening before drilling any holes. Accurate measurements ensure the door fits properly and operates smoothly.
Secure the frame or mounting brackets according to the installation guide. Once the glass panels or doors are installed, check that they open and close easily without rubbing against adjacent surfaces.
Apply waterproof silicone sealant around the frame where recommended to help prevent water from escaping onto the bathroom floor.
For walk-in showers, install the fixed glass panel securely and confirm that it is properly aligned before tightening all hardware.
Step 7: Seal Every Joint
Waterproofing is one of the most important parts of any shower installation.
Apply a continuous bead of mildew-resistant silicone sealant around:
- The shower base
- Wall panel joints
- Shower door frame
- Plumbing penetrations
- Corner seams
Smooth the sealant with a finishing tool or a damp finger to create a clean, even seal.
Allow the sealant to cure fully before using the shower. Skipping this waiting period can weaken the seal and increase the risk of leaks.
Step 8: Test the Shower
Before considering the project complete, thoroughly test every component.
Turn the water supply back on slowly and inspect all plumbing connections for leaks.
Run both hot and cold water through the shower while checking:
- Water pressure
- Temperature control
- Drainage speed
- Showerhead performance
- Door seals
- Wall joints
- Base connections
Allow the shower to run for several minutes and inspect the surrounding floor for signs of moisture.
Any small leak should be repaired immediately before regular use.
Tips for a Successful Shower Installation
Careful planning can make the installation process easier and help prevent costly mistakes.
- Measure your bathroom carefully before purchasing materials.
- Always use waterproof materials designed for wet environments.
- Double-check plumbing connections before closing walls.
- Never skip waterproofing behind tile or wall panels.
- Follow manufacturer installation instructions closely.
- Allow sealants and adhesives to cure completely before using the shower.
- Keep the work area clean throughout the project to avoid installation errors.
Taking your time during each stage often produces better long-term results than rushing to finish quickly.
Common Mistakes to Avoid
Even experienced DIY homeowners can make mistakes during shower installation.
One of the most common errors is installing the shower base on an uneven floor. This can cause standing water, poor drainage, and long-term damage.
Another frequent mistake is applying too little waterproof sealant or missing critical joints. Even a small gap can allow water to reach the walls or subfloor, leading to mold and structural damage.
Many homeowners also fail to test plumbing connections before completing the installation. Identifying leaks after walls or panels are finished often requires expensive repairs.
Finally, avoid choosing shower materials based only on appearance. Durability, water resistance, and ease of maintenance are equally important when selecting products for your bathroom.
When Should You Hire a Professional?
Many homeowners can handle basic shower replacements, but some projects require professional expertise. If your installation involves moving plumbing lines, relocating the drain, waterproofing an entire shower area, or modifying walls, hiring an experienced contractor is often the safest and most cost-effective choice.
Professional installers understand local building codes, proper waterproofing techniques, and plumbing requirements. They also have the tools and experience to complete the job efficiently while minimizing the risk of leaks, mold, or structural damage.
Hiring a professional can also save you time and provide peace of mind, especially for custom showers or full bathroom renovations.
Why Choose Dr. Domicile LLC?
Installing a shower requires precision, quality workmanship, and careful attention to detail. At Dr. Domicile LLC, we specialize in professional bathroom remodeling and shower installation services designed to improve both the appearance and functionality of your home.
From helping you choose the right shower system to completing every stage of the installation, our experienced team is committed to delivering exceptional results. We use high-quality materials, follow industry best practices, and ensure every shower is installed correctly to help prevent leaks, drainage issues, and unnecessary repairs.
Whether you’re replacing an outdated shower, upgrading to a modern walk-in design, or completing a full bathroom renovation, Dr. Domicile LLC provides reliable craftsmanship, clear communication, and dependable service from start to finish.
Frequently Asked Questions
Can I install a shower without replacing the existing plumbing?
Yes. If the new shower uses the same plumbing layout as the existing one, installation is generally simpler and less expensive. However, all plumbing connections should still be inspected to ensure they are in good condition.
How long does it take to install a shower?
A standard shower replacement can often be completed within one to three days. More complex projects involving custom tile work, plumbing modifications, or structural repairs may take several days or longer.
Do I need to waterproof the shower walls?
Absolutely. Proper waterproofing is one of the most important parts of shower installation. Waterproof membranes, backer boards, and quality sealants help protect your walls from moisture and prevent mold or water damage.
What type of shower is easiest to install?
Prefabricated shower kits are generally the easiest option for homeowners because they include pre-made components that fit together quickly. Custom tile showers require more skill, preparation, and waterproofing.
How do I prevent shower leaks?
Proper installation is the key. Ensure the shower base is level, use high-quality waterproof sealant around all joints, install the drain correctly, and test every plumbing connection before using the shower regularly.
Final Thoughts
Installing a shower takes careful planning and the right steps to make sure it works properly. While some homeowners can handle simple shower installations, bigger projects with plumbing, tile, or layout changes are better done by professionals. Dr. Domicile LLC offers reliable shower installation and bathroom remodeling services to help create a bathroom that looks great and works well. Contact our team today to schedule a consultation and get started on your bathroom project.